

My Legacy
My Legacy is your online account with Legacy Church. Update your profile photo, address, phone number, and email, view your giving history, and download annual giving statements.
Sign in or create an account to get started. Below, you’ll find step-by-step guides with screenshots to help you update your profile and access your giving statements.
Sign-in opens in a new tab so you can keep these instructions handy.
Your Information
Update Your Profile
Choose a guide below and use its button to open the right screen in your account. Keep this page open to follow along. The steps below also show how to get there from the home page.
- Sign in to My Legacy ↗ with your Email or Mobile Number and Password, then select Sign In.
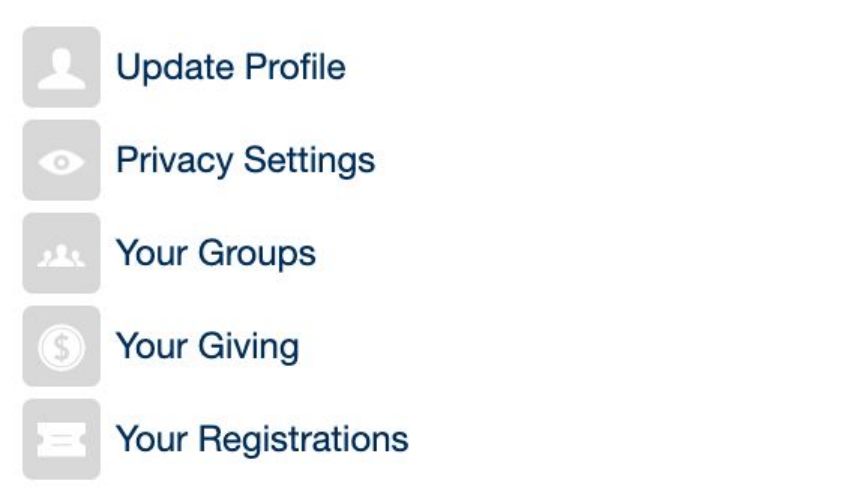
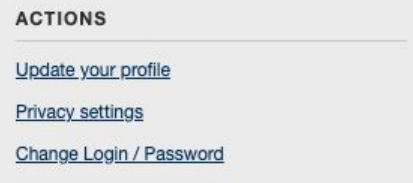
- On the home page, select Update Profile. This opens your profile summary. Under ACTIONS, select Update your profile to open the edit form.
- Follow the guide below for the information you want to change. For profile details, scroll to the bottom of the form and select Save changes. Photos have their own save button.
Add or change my profile photo
Select Change beneath your photo. Opens in a new tab. Sign in if prompted.
If you land on the home page after signing in, follow step 1 below.
1 Open the right screen
After signing in, choose Update Profile on the home page. Then, under ACTIONS, choose Update your profile.
2 Choose your photo
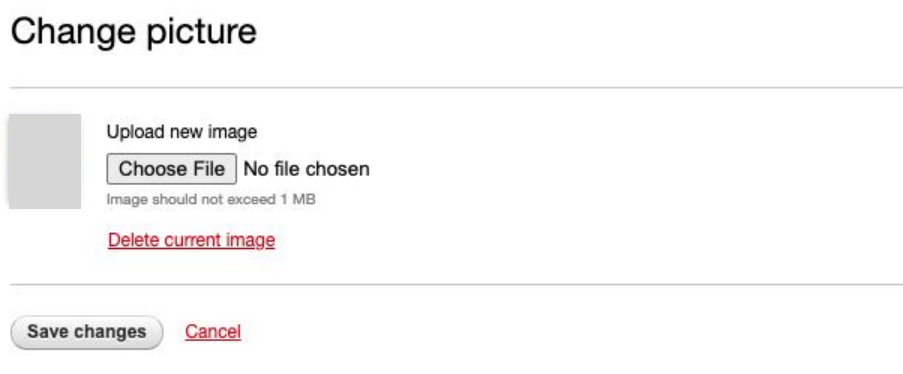
Select Change beneath your photo or placeholder. On Change picture, select Choose File under Upload new image and pick a photo from your device. Use an image 1 MB or smaller.
3 Save the new picture
Select Save changes on the Change picture screen. Check that the new photo appears on your profile.
Personal information is hidden in these screenshots.
Update my household address
Go to Household Address in the profile form. Opens in a new tab. Sign in if prompted.
If you land on the home page after signing in, follow step 1 below.
1 Open the right screen
After signing in, choose Update Profile on the home page. Then, under ACTIONS, choose Update your profile.
2 Enter your current address
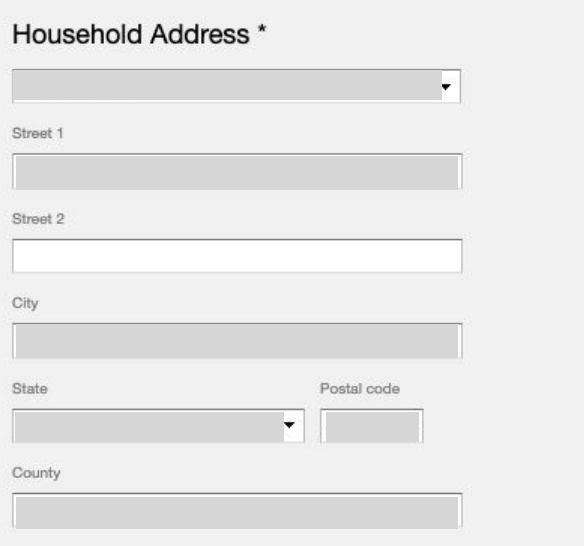
Scroll to Household Address. Update Street 1, Street 2 if needed, City, State, and Postal code. Review country and county. This address is shared by your household.
3 Save your changes
Scroll to the bottom of the form and select Save changes. Review your profile to check the update.

Personal information is hidden in these screenshots.
Update my mobile or household phone
Go to Phone in the profile form. Opens in a new tab. Sign in if prompted.
If you land on the home page after signing in, follow step 1 below.
1 Open the right screen
After signing in, choose Update Profile on the home page. Then, under ACTIONS, choose Update your profile.
2 Update your phone number
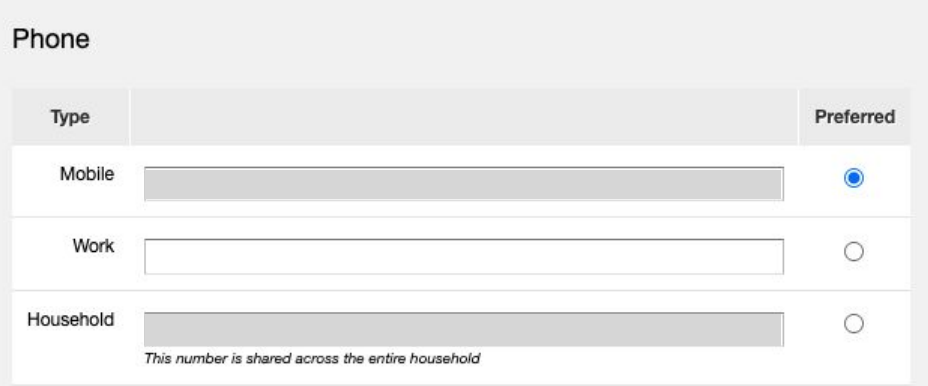
Scroll to Phone. Put your personal cell number in Mobile. Select the circle under Preferred beside the number the church should use first. The Household number is shared.
3 Save your changes
Scroll to the bottom of the form and select Save changes. Review your profile to check the update.
Personal information is hidden in these screenshots.
Update my contact email
Go to Email in the profile form. Opens in a new tab. Sign in if prompted.
If you land on the home page after signing in, follow step 1 below.
1 Open the right screen
After signing in, choose Update Profile on the home page. Then, under ACTIONS, choose Update your profile.
2 Update your contact email
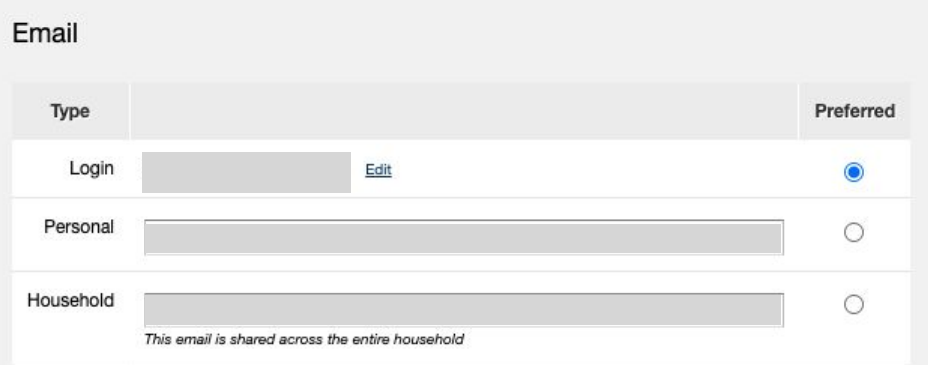
Scroll to Email. Update Personal or the shared Household email. Choose your Preferred email. To change the email you sign in with, use the login guide below.
3 Save your changes
Scroll to the bottom of the form and select Save changes. Review your profile to check the update.
Personal information is hidden in these screenshots.
Change my login email or password
Opens Account Settings. Opens in a new tab. Sign in if prompted.
If you land on the home page after signing in, follow step 1 below.
1 Open the right screen
After signing in, choose Update Profile on the home page. Then, under ACTIONS, choose Change Login / Password.
2 Enter your new login details
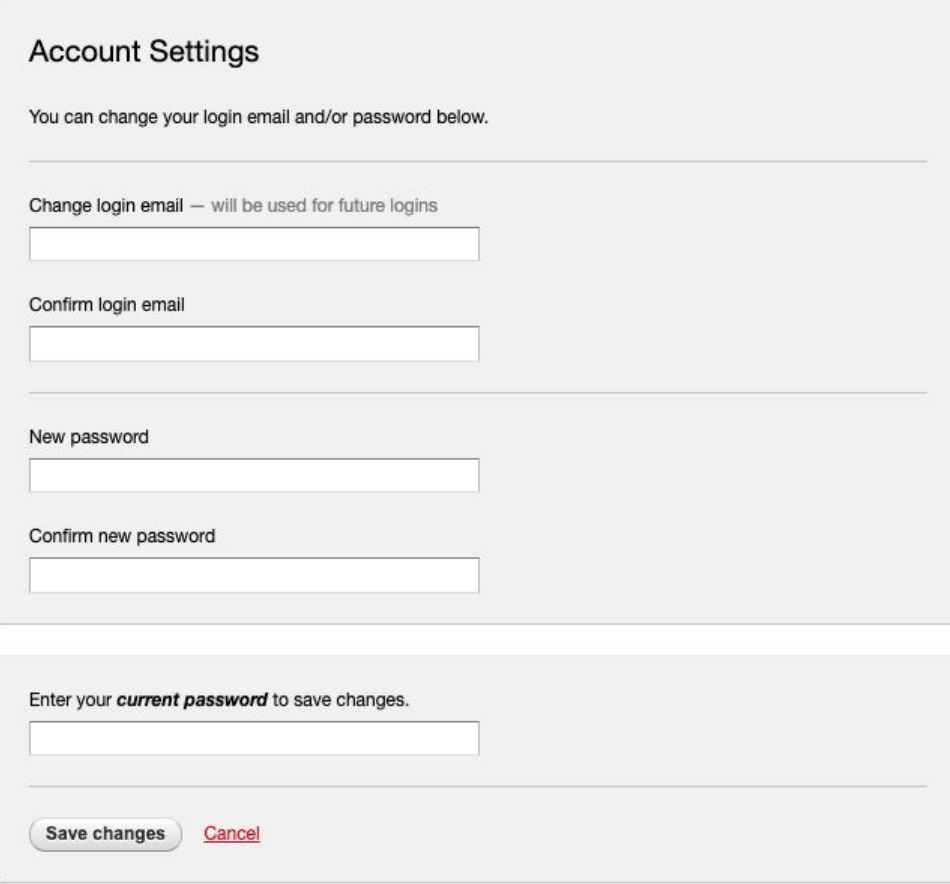
For a new sign-in email, fill in Change login email and Confirm login email. For a new password, fill in New password and Confirm new password.
3 Confirm with your current password
Enter your current password, then select Save changes. Use the new details next time. Forgot your current password? Use forgot? on the sign-in screen.
Personal information is hidden in these screenshots.
Update other personal details
In the profile edit form, update the details you need, then select Save changes at the bottom. You can also add an emergency contact. To edit a child’s information, look for Edit beside their name under HOUSEHOLD. If no Edit link appears for a family member, contact the church for help.
Seeing your details but no editable boxes? You may still be on the profile summary. Select Update your profile under ACTIONS. If that option is missing, call 505-831-0961 and ask for help updating your My Legacy profile.
Open My Profile Editor ↗First Time Here?
Create Your Account
Already have an account? Use it to sign in. If you forgot your password, try the password-reset option on the sign-in page first.
- Open the account sign-up page ↗. It opens in a new tab.
- Enter your first name, last name, and login email. Use an email you can access.
- Create and confirm your password. Under Security Check, type the characters shown in the picture, then select Create an account.
- Follow any confirmation instructions shown on screen or sent to your email. Then sign in to your account.
Giving history may take 48–72 hours to appear. If you have an older account or can’t access its email, create your new account, then call 505-831-0961 and ask the finance department to merge your records. Your previous giving will not appear until the merge is complete.
Your Giving
Download Your Giving Statement
View your giving history and download an available annual statement from your account.
Open your giving history and choose the year you need. Opens in a new tab. Sign in if prompted.
If you land on the home page after signing in, follow step 1 below.
- From the home page, select Your Giving, or use GIVING at the top of the page.
- On the History page, choose the Year you need, then select View. Review Contributions for to see whose gifts are included.
- Select Download statement. If the PDF opens in your browser, use its download or save option. Otherwise, look in your device’s Downloads folder or browser download list.
Follow along with screenshots
Choose your year, then select View. Opens in a new tab. Sign in if prompted.
If you land on the home page after signing in, follow step 1 below.
1 Open Your Giving
After signing in, choose Your Giving on the home page.
2 Choose the year and view your history
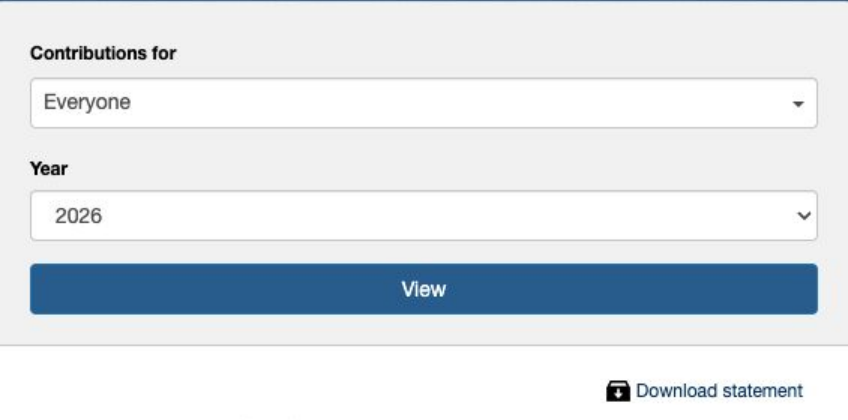
Check Contributions for, select the Year, and choose View.
3 Download your statement
Select Download statement. If the PDF opens in your browser, save it from there. Otherwise, check Downloads.
Missing gifts or a statement? If your account is new, allow 48–72 hours for giving history to sync. If it still looks incomplete, call 505-831-0961 and ask for the finance department.
Need a Hand?
We’ll help you take the next step.
I forgot my password.
Open the sign-in page ↗ and select forgot? beside Password, or open password recovery directly ↗. Enter the email address you use to sign in and request a reset link. Check your email, including spam or junk, then follow the link to reset your password. If you no longer have access to your login email, call us for help.
My information won’t save.
Check for a required field or error message, correct it, and save again. If editing is unavailable or your update still does not appear, call us and explain what you were trying to change.
For profile or sign-in help, call the church office.
For giving statements or merged records, ask for the finance department.
Back to top ↑
Latest Media
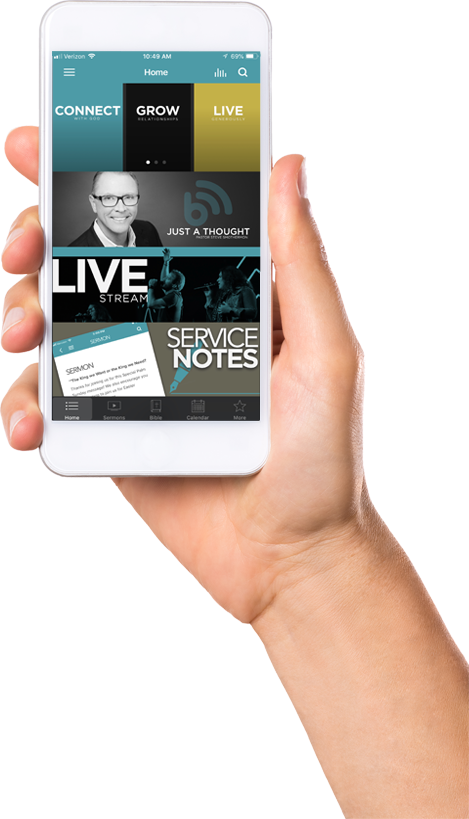
Check out our latest sermons, stream church service live or see other videos and podcasts.